
As autumn leaves start to fall and crisp winds blow, nothing captures the essence of the season quite like a warm, freshly baked homemade pumpkin pie. I’ve perfected this classic recipe that transforms simple ingredients into a mouthwatering dessert that will become an instant family favorite.
My homemade pumpkin pie isn’t just a recipe—it’s a cherished tradition that brings loved ones together. From the first whiff of warm spices to the creamy, rich filling nestled in a perfectly flaky crust, this pumpkin pie represents comfort and celebration in every single bite.
Whether you’re an experienced baker or trying your hand at pie-making for the first time, this recipe will guide you through creating a show-stopping dessert that tastes like it came straight from a professional bakery. Get ready to discover the magic of crafting the ultimate pumpkin pie that will have everyone asking for seconds.
Why This Classic Pumpkin Pie Will Become Your Family’s Tradition
Creating the best pumpkin pie isn’t just about baking—it’s about crafting memories that last generations. My family’s classic pumpkin pie recipe carries a special magic that transforms a simple dessert into a cherished tradition.
What makes this classic pumpkin pie stand out? The perfect blend of warm spices, silky smooth texture, and a homemade touch that store-bought pies can’t replicate. When you bite into this pie, you’ll taste a rich combination of cinnamon, nutmeg, and pure pumpkin that instantly connects you with autumn’s warmth.
| Tradition Factor | Our Classic Pumpkin Pie Advantage |
|---|---|
| Flavor Depth | Multilayered spice profile |
| Texture | Creamy and consistent |
| Family Connection | Shared baking experience |
Baking this best pumpkin pie together creates moments of connection. Imagine grandparents teaching children secret techniques, laughter filling the kitchen, and the anticipation of that first warm slice. This isn’t just a dessert—it’s a delicious piece of family history waiting to be shared.
Every time you prepare this classic pumpkin pie, you’re not just mixing ingredients. You’re weaving a delicious narrative that bridges generations, creating a sweet tradition that will be remembered long after the last crumb disappears.
Essential Ingredients for the Perfect Pumpkin Pie
Creating a delicious pumpkin pie recipe starts with selecting the right ingredients. I’ll guide you through the essential components that will transform your pie from good to extraordinary.
Choosing the Right Type of Pumpkin
Not all pumpkins are created equal when it comes to baking. For the best pumpkin pie recipe, I recommend using sugar pumpkins (also called pie pumpkins). These smaller, sweeter varieties have a smoother texture and more concentrated flavor compared to large carving pumpkins.
Must-Have Pumpkin Pie Spices
Pumpkin pie spices are the secret to an authentic, warm flavor. My go-to blend includes ground cinnamon, nutmeg, ginger, and cloves. Each spice contributes a unique depth that makes your pumpkin pie truly memorable.
| Spice | Flavor Profile | Quantity per Pie |
|---|---|---|
| Cinnamon | Warm, sweet | 2 teaspoons |
| Nutmeg | Nutty, aromatic | 1/2 teaspoon |
| Ginger | Spicy, sharp | 1/2 teaspoon |
| Cloves | Intense, earthy | 1/4 teaspoon |
Additional Ingredients You’ll Need
Beyond pumpkin and spices, your pumpkin pie recipe requires a few key ingredients. Sweetened condensed milk provides creamy richness, while eggs help bind the filling. Brown sugar adds depth, and a touch of vanilla extract enhances the overall flavor profile.
Kitchen Tools and Equipment Required
Preparing an easy pumpkin pie requires some essential kitchen tools that will make your baking experience smooth and enjoyable. I’ll help you understand exactly what equipment you’ll need to create this delightful autumn dessert.
For a successful easy pumpkin pie, you’ll want to gather several key tools before starting. A 9-inch pie dish is crucial for baking the perfect pie. Glass or ceramic dishes work best for even heat distribution. Measuring cups and spoons are non-negotiable to ensure precise ingredient quantities.
| Essential Tools | Purpose |
|---|---|
| Pie Dish | Baking and serving the pie |
| Mixing Bowls | Preparing filling and crust |
| Whisk | Blending ingredients smoothly |
| Rolling Pin | Creating perfect pie crust |
| Measuring Tools | Accurate ingredient proportions |
Additional helpful tools include a food processor for pie crust, a pastry brush for egg wash, and an offset spatula for smooth filling. A digital kitchen scale can also help with precise measurements, ensuring your easy pumpkin pie turns out perfectly every time.
Don’t worry if you’re missing a specific tool. Many kitchen gadgets can be substituted creatively. The most important thing is having fun while creating a delicious homemade dessert.
Making the Perfect Flaky Pie Crust From Scratch
Creating a stellar pumpkin pie crust is an art form that transforms an ordinary dessert into a culinary masterpiece. The secret to an incredible pumpkin pie crust lies in understanding the delicate balance of ingredients and technique.
Cold Butter Technique
When making a pumpkin pie crust, temperature is critical. I always keep my butter in the freezer for about 15 minutes before starting. Cold butter creates small, distinct fat pockets that result in a flakier texture. Cut the butter into small cubes and work quickly to prevent warming.
Rolling and Shaping Tips
Rolling out your pumpkin pie crust requires patience and technique. Use a marble or chilled surface to keep the dough cool. Roll from the center outward, rotating the dough periodically to ensure an even thickness. Aim for a circle about 2 inches larger than your pie dish.
Pre-Baking Instructions
Pre-baking, or blind baking, is crucial for preventing a soggy pumpkin pie crust. Line the crust with parchment paper, fill with pie weights or dried beans, and bake at 375°F for 15 minutes. This step ensures a crisp, golden crust that holds up beautifully against the creamy pumpkin filling.
| Pumpkin Pie Crust Factor | Recommended Technique |
|---|---|
| Butter Temperature | Frozen/Very Cold |
| Rolling Surface | Chilled Marble or Countertop |
| Pre-Baking Temperature | 375°F |
| Pre-Baking Duration | 15 Minutes |
How to Prepare Fresh Pumpkin Pie Filling
Creating the perfect pumpkin pie filling starts with selecting the right ingredients. I recommend using either fresh sugar pumpkins or high-quality canned pumpkin puree for the best results. Fresh pumpkins require a bit more preparation, but the flavor can be incredibly rich and authentic.
When working with fresh pumpkins, I always start by roasting the pumpkin to bring out its natural sweetness. Cut the pumpkin in half, remove the seeds, and roast at 400°F for about 45 minutes until tender. Once cooled, scoop out the flesh and puree it until smooth for your pumpkin pie filling.
| Ingredient | Quantity | Purpose |
|---|---|---|
| Pumpkin Puree | 2 cups | Base of pumpkin pie filling |
| Sweetened Condensed Milk | 1 can (14 oz) | Adds creaminess and sweetness |
| Eggs | 2 large | Binds the pumpkin pie filling |
| Pumpkin Pie Spice | 2 teaspoons | Provides classic flavor |
For those using canned pumpkin, ensure you’re buying pure pumpkin puree, not pumpkin pie filling. The key to a smooth pumpkin pie filling is whisking the ingredients thoroughly. Blend your pumpkin puree with eggs, condensed milk, and spices until completely integrated, avoiding any lumps that could affect the texture.
My secret to an incredible pumpkin pie filling is letting the mixture rest for about 15 minutes before pouring it into the pie crust. This allows the spices to meld and creates a more complex, rich flavor profile that will make your pumpkin pie truly memorable.
Secret Tips for a Smooth and Creamy Texture
Creating the best pumpkin pie isn’t just about following a recipe—it’s about mastering the art of texture. A perfect pumpkin pie should be silky smooth, with no lumps or grainy spots that can ruin the eating experience.
Proper Mixing Methods
When preparing your best pumpkin pie filling, gentle mixing is key. I recommend using a whisk or electric mixer on low speed. Overmixing can introduce air bubbles and create a less creamy texture. Blend ingredients until they’re just combined, stopping as soon as you see a uniform color and consistency.
Temperature Control Techniques
Temperature plays a crucial role in achieving a smooth pumpkin pie. Bring all ingredients to room temperature before mixing. Cold eggs or cream can cause lumpy filling. Warm ingredients blend more seamlessly, creating that luxurious, creamy texture every baker desires.
Avoiding Common Texture Problems
To prevent graininess in your best pumpkin pie, strain the pumpkin puree through a fine-mesh sieve before mixing. This removes any stringy bits that could create an uneven texture. For an extra-smooth filling, consider using an immersion blender to eliminate potential lumps.
Step-by-Step Baking Instructions
Baking the perfect pumpkin pie recipe requires careful attention to detail. I’ll walk you through the essential steps to create a delicious homemade dessert that will impress your family and friends.
Start by preheating your oven to 425°F (218°C). This high initial temperature helps create a crisp pie crust. Place your pie dish on a sturdy baking sheet to catch any potential drips and ensure even heat distribution.
Carefully pour your prepared pumpkin pie filling into the pre-baked pie crust. Fill the crust to about 1/4 inch from the top, taking care not to overfill. To prevent the crust edges from burning, use aluminum foil or a pie crust shield to cover the rim.
| Baking Stage | Temperature | Time |
|---|---|---|
| Initial Baking | 425°F | 15 minutes |
| Final Baking | 350°F | 40-50 minutes |
After the initial 15 minutes at high heat, reduce the oven temperature to 350°F (177°C). This gradual temperature change helps the pumpkin pie recipe develop a smooth, creamy texture without cracking. Bake for an additional 40-50 minutes until the filling is almost set but still slightly jiggly in the center.
My secret tip for a perfect pumpkin pie recipe is to watch the pie closely during the last 15 minutes of baking. The center should look slightly underdone, as it will continue to set while cooling.
How to Tell When Your Pumpkin Pie is Done
Baking the perfect homemade pumpkin pie requires knowing exactly when it’s ready to come out of the oven. Mastering the art of pie doneness can make the difference between a delicious dessert and a disappointing result.
Visual Cues for Perfect Doneness
When baking your homemade pumpkin pie, look for specific signs that indicate it’s perfectly cooked. The pie’s center should have a slight wobble when gently shaken – think of a gentle jiggle, not a full-on wave. The edges of the crust will turn a beautiful golden-brown, creating a stunning contrast with the rich pumpkin filling.
Knife Test for Precision
I recommend using the knife test to check your homemade pumpkin pie’s readiness. Insert a thin knife near the pie’s center. If it comes out clean or with just a few moist crumbs, your pie is perfectly baked. Wet batter on the knife means it needs more time in the oven.
Cooling and Setting Time
Patience is key with homemade pumpkin pie. Allow the pie to cool at room temperature for at least two hours. This critical resting period helps the filling set properly, ensuring a smooth, creamy texture that slices cleanly.
| Baking Stage | Visual Indicator | Action |
|---|---|---|
| Early Baking | Liquid Center | Continue Baking |
| Perfect Doneness | Slight Jiggle | Remove from Oven |
| Cooling | Firm, Smooth Surface | Let Rest 2 Hours |
With these tips, you’ll create a homemade pumpkin pie that’s sure to impress your family and friends. Remember, practice makes perfect!
Serving Suggestions and Storage Tips
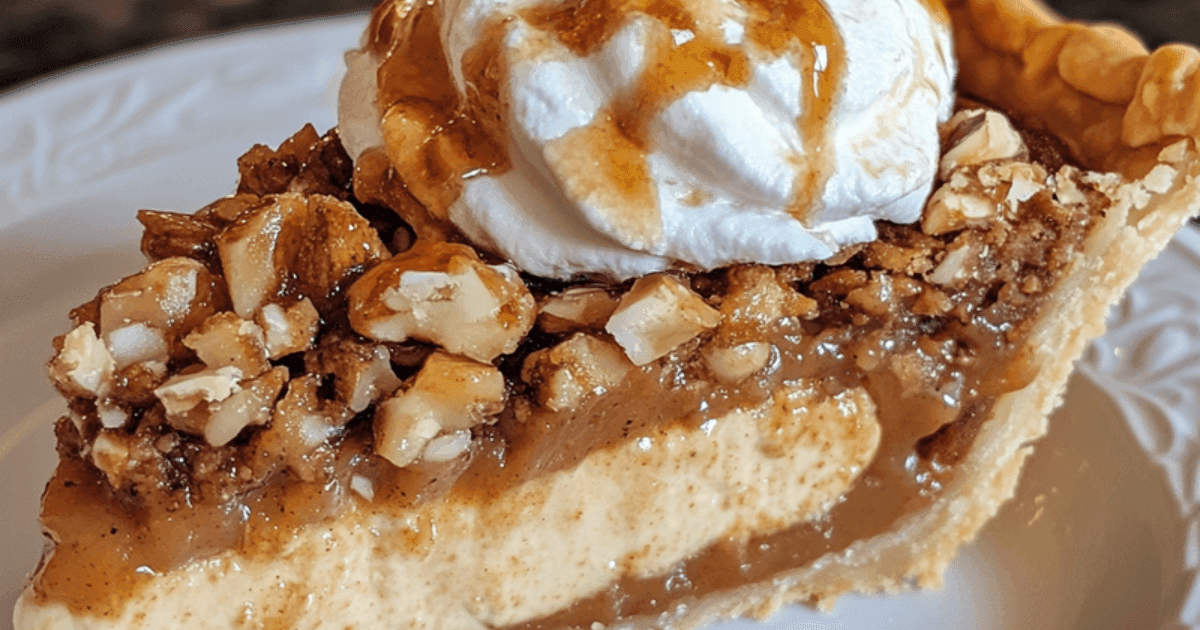
After creating your delicious homemade pumpkin pie, serving and storing it properly can make all the difference in enjoying this classic dessert. I recommend serving the pie at room temperature for the best flavor and texture. A dollop of freshly whipped cream adds a beautiful finishing touch that complements the rich pumpkin pie perfectly.
Storing your pumpkin pie requires some care. Always refrigerate the pie within two hours of baking to prevent bacterial growth. Wrap the pie loosely with plastic wrap or aluminum foil before placing it in the refrigerator. A properly stored pumpkin pie can last up to 4 days while maintaining its delightful taste and creamy consistency.
When it comes to reheating, gently warm individual slices in the oven at 200°F for about 10 minutes. This method helps restore the pie’s original texture without drying it out. Avoid microwaving, as it can make the crust soggy and compromise the smooth pumpkin pie filling.
| Storage Method | Duration | Best Practices |
|---|---|---|
| Refrigerated | 3-4 days | Cover loosely, store at 40°F |
| Frozen | 1-2 months | Wrap tightly in plastic and foil |
For those who want to prepare ahead, you can freeze your pumpkin pie for up to two months. Wrap it carefully to prevent freezer burn, and thaw in the refrigerator overnight before serving. This way, you can enjoy your homemade pumpkin pie whenever the craving strikes!
Troubleshooting Common Pumpkin Pie Problems
Making an easy pumpkin pie can sometimes come with unexpected challenges. Don’t worry – I’ll help you navigate through the most common baking issues that might pop up during your pie-making adventure.

Baking the perfect easy pumpkin pie requires patience and some key techniques. Knowing how to address potential problems will boost your confidence in the kitchen.
Preventing Cracks and Bubbles
Cracks in your pumpkin pie can be frustrating. The secret is to avoid overmixing the filling and baking at the right temperature. Gentle mixing prevents air bubbles, while a consistent oven temperature helps create a smooth surface.
Fixing Texture Issues
Texture can make or break your easy pumpkin pie. A runny filling often means the pie needs more baking time. Conversely, an overly firm filling might indicate too much flour or overbaking.
Addressing Crust Problems
Crust issues are common in pumpkin pie baking. A soggy bottom can be prevented by pre-baking the crust and using a pie shield to protect the edges from burning.
| Problem | Cause | Solution |
|---|---|---|
| Cracked Surface | Overmixing | Mix ingredients gently |
| Runny Filling | Underbaking | Extend baking time |
| Soggy Crust | Moisture | Pre-bake crust |
With these tips, you’ll be well-equipped to create a flawless easy pumpkin pie that will impress your family and friends.
Conclusion
Creating a classic pumpkin pie is more than just following a recipe – it’s about crafting a delicious memory that connects generations. By walking through each carefully explained step, you’ve learned the secrets to baking an incredible homemade classic pumpkin pie that will delight your family and friends.
The techniques we’ve explored transform simple ingredients into a spectacular dessert. From selecting the right pumpkin to mastering the flaky crust and smooth filling, you now possess the skills to create a pie that looks and tastes professionally prepared. This classic pumpkin pie isn’t just a dessert – it’s a culinary tradition waiting to become part of your household’s special moments.
Baking brings people together, and this recipe embodies the warmth of autumn. Whether you’re preparing it for Thanksgiving, a weekend gathering, or simply to enjoy a slice of seasonal comfort, your homemade classic pumpkin pie represents love served on a plate. I hope this guide inspires you to embrace baking and create delicious memories in your own kitchen.
Remember, practice makes perfect. Each pie you bake will become more delightful, and soon you’ll be known as the family’s pumpkin pie expert. Enjoy your baking adventure!